Click to rate this post!
[Total: 2 Average: 5]

As we all know, the Home Office has announced that it will abolish BRPs from 31 December 2024 and replace them with an electronic service called e-visa. Last week we published our article on the details of the system. In this article, we will explain step by step how to set up a UKVI account, which is one of the requirements for e-visa.

First, we will open our application page from the link below;

https://www.gov.uk/get-access-evisa

E vize aşama 1

We will start our application process by saying "Start Now".

E vize aşama 2

Tick "Yes" to the question "Have you ever had BRP?" and proceed to the next stage.

Answer 'Yes' to both questions to proceed to the next stage. (If you still have your BRP card and if it is still valid)

E vize aşama 5

We proceed to the next stage by selecting "Me" when asked who you are creating an account for. (If you are filling the application for someone else ‘child, baby etc’ please tick the “Someone else” option and give relationship information in the next step)

In this section we enter the applicants first and last names and move on to the next stage. (If you have two names, you must enter both names with a space between them).

E vize aşama 7

Once we have added our nationality information, we will continue with our application.

E vize aşama 8

You can choose one of the above options for your authentication. We recommend that you select BRP as identity mapping will take place at a later stage. Moreover, after selecting the BRP, you will be able to proceed to the next stage.

At this stage we will enter your date of birth and the details of the email address you will use to log into your UKVI account. We recommend that you ensure that your email is an active and consistent email address.

E vize aşama 11

If you want to enter the phone number as a UK number; You can write your phone number without adding the area code (+44) which means you can write in the form of 07xxx and go to the next step. However, if you are adding a non-UK number; You must add the area code at the start of your number.

E vize aşama 12

If you do not want anyone else to access the account, you can continue by saying "No".

E vize aşama 13

You can proceed to the next stage by checking the information you have entered. At this stage you will need to log into the account you have created and verify your identity.

E vize aşama 14

At this stage, select the ID you used to create the account and proceed to the next stage.

Enter the number on the top left of your BRP card and go to the next step and enter your date of birth again.

E vize aşama 17

For the verification code, go to the next step by clicking on one of the options with the e-mail address or telephone number.

E vize aşama 18

Proceed to the next stage by clicking on Start Application to apply for “Standalone Account Registration” for Authentication.

E vize aşama 19

At the top of the page, click 'Confirm Your Identity' to proceed to the next stage.

To verify at this stage, your phone must have a smartphone function. If you are using an Apple device, your phone must be iPhone 7 or higher.

E vize aşama 22

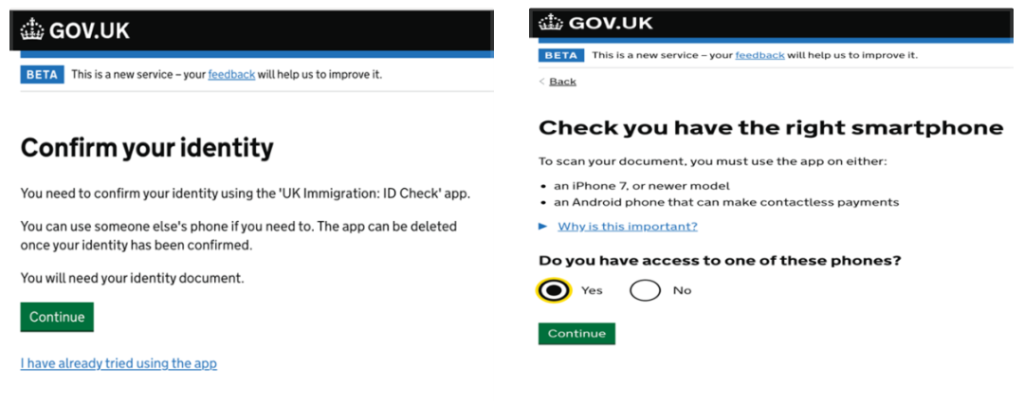
In this section you will need to download the above application to your phone. The application can be found in the AppStore and GooglePlay.

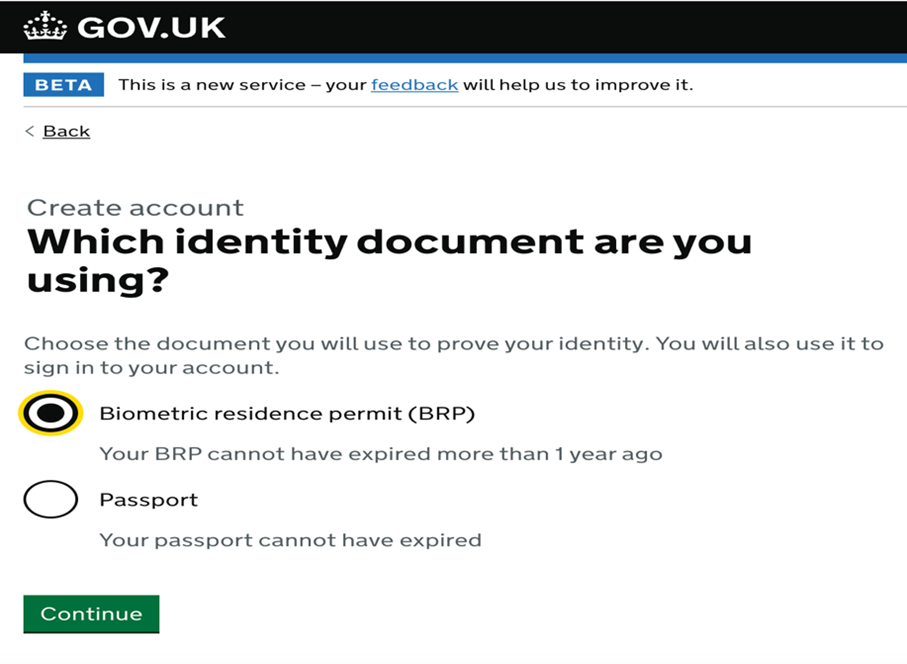
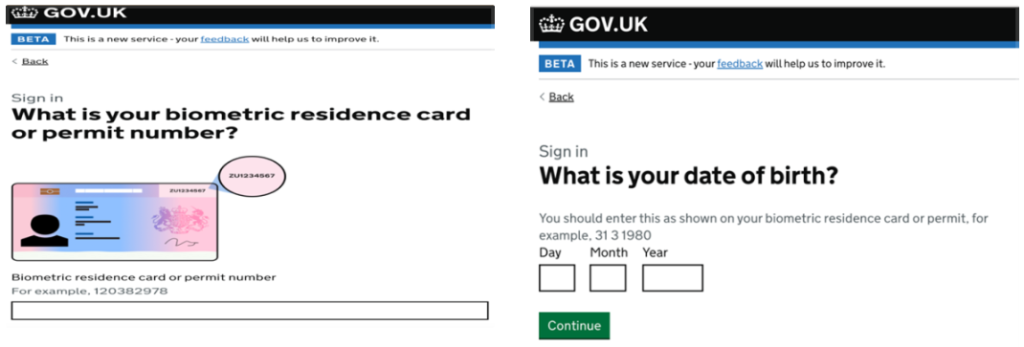
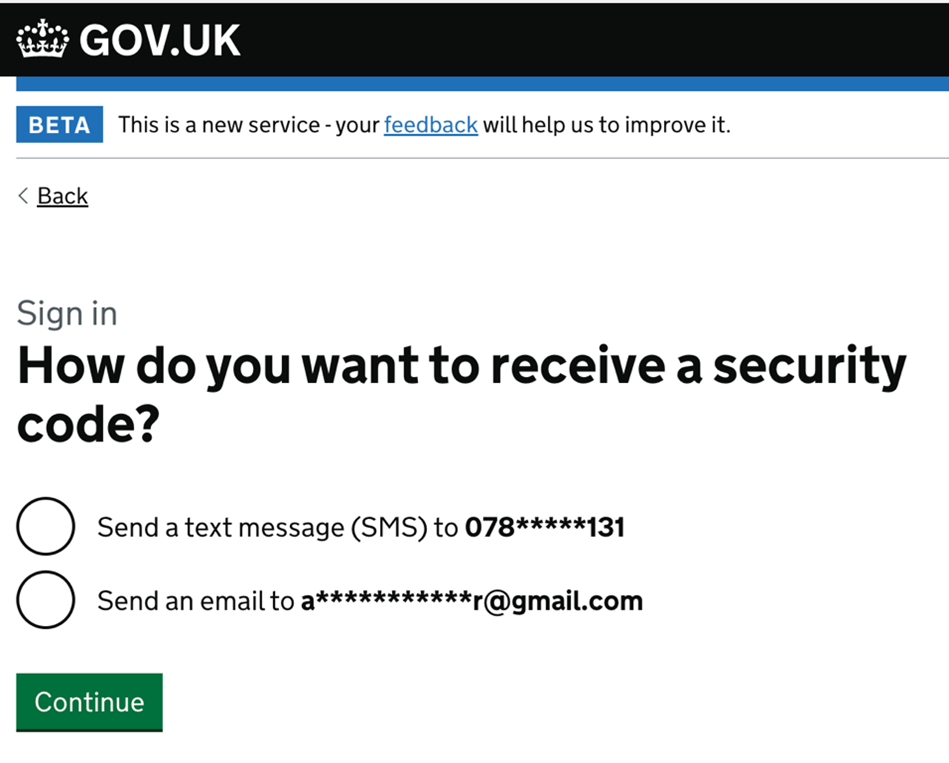
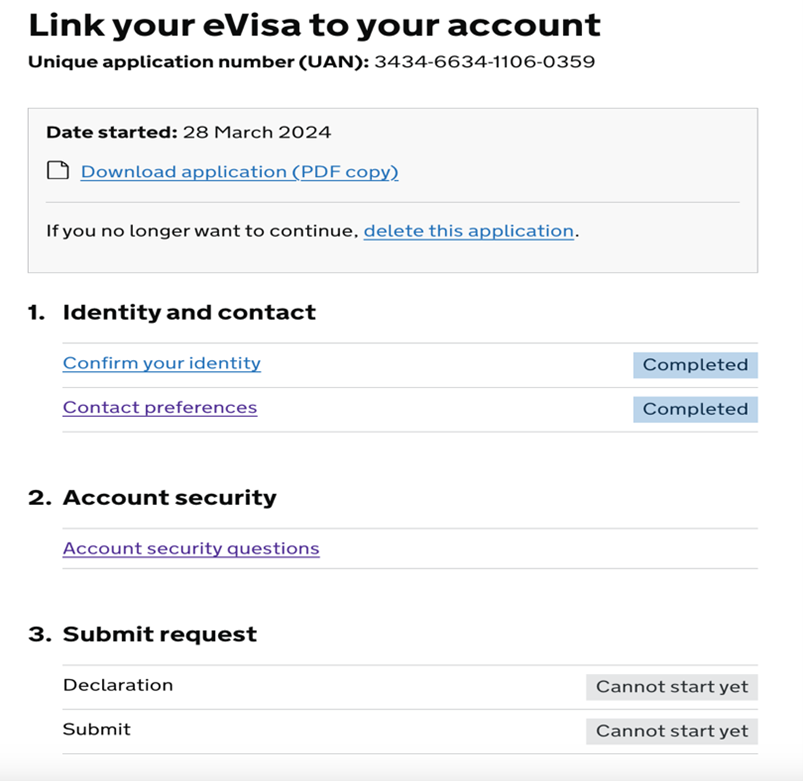
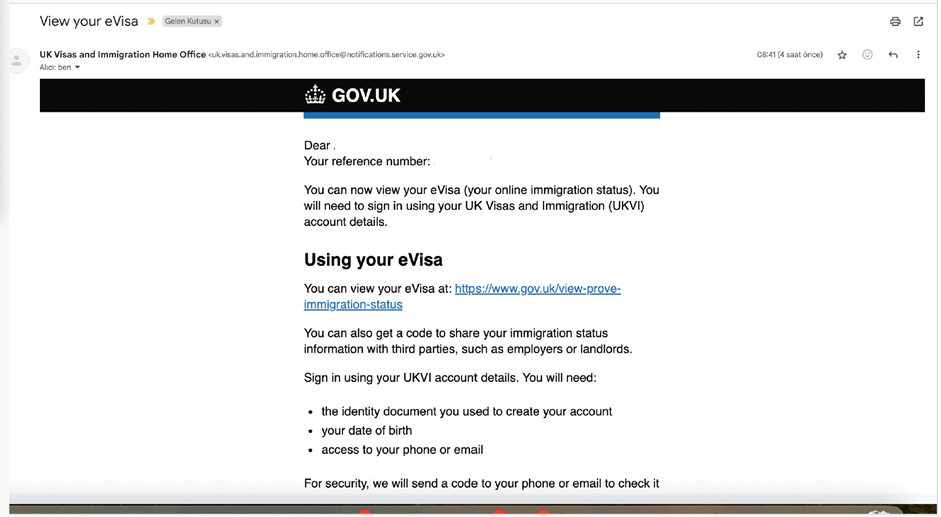
After downloading the application, your BRP information, face verification process and photo verification process will be completed. You can complete the verification process by following the steps in the application. Once the verification process is complete, you will need to login again using the link below.

After clicking on the link, we will click on the 'Login' option as we have already created an account. After verifying your email address or phone number, you will see the following page.

E vize aşama 24

If you have successfully completed the authentication process, the first stage will appear as "Completed". We will then proceed to the second stage and select the 'Submit' option to create the security questions in this section and complete our application. (We recommend that you write down your security questions so that you do not forget them. If there is a problem with your account in the future, you will be able to access your account using your security questions).

E vize aşama 25

Once you have submitted your application, the following email will be sent to the email address you used in your application.

Some time after you receive the above email, you will receive another email confirming that your E-Visa account has been approved.

E vize aşama 26

At this stage, you can check your immigration status by clicking on the link in the confirmation email. This link is below and you may receive the following warning when you click on the link as you are still in the application process. We expect this issue to be resolved in the next few periods.

Stay tuned for further updates.

Halil İbrahim Koca

Immigration Adviser

TOP